Report on 3D Printers
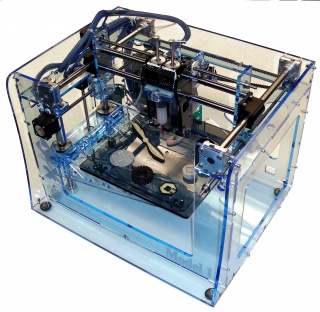
In the last few years Rapid Prototyping(RP) has become more automated and much cheaper. Machines suitable for offices and academic environments have appeared on the market and have been christened 3D Printers. A range of different RP technologies exist and two companies have come to dominate the market, Stratasys & ZCorp. A quality 3D printer from either of these two will cost in the order of £30,000. Each has its advantages but to me the color capabilities of the ZCorp 510 makes this easily the most desirable machine. It is the machine currently used by the majority of the top UK 3D print bureaus. Also Bristol Fine Print Research have a couple of ZCorp machines. If you had a larger budget (£100,000+) then you could look to go to the high end Rapid Prototyping machines again from Stratasys which can build to a much larger size and precision and also use a bigger variety of build mediums. There are also some cheap and cheerful approaches you could take with a budget of a few thousand pounds.
Prodigy Plus
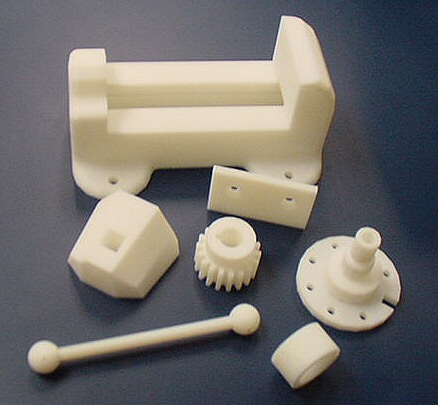
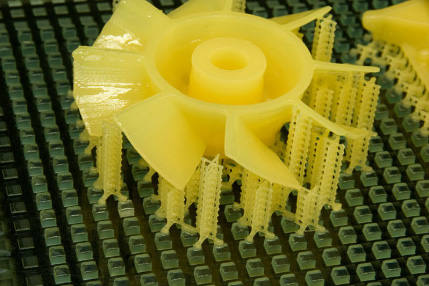
UAL Central St.Martins currently own a Prodigy Plus machine (a few years old) which was an early Stratasys model. It uses Fused Deposition Modelling (FDM) where heated plastic is squeezed through a nozzle and is fused to the previous layer. The plastic requires a support structure to be built as it goes along otherwise it would just squirt into a big puddle. The support structure is removed afterwards. The models i saw were mainly hollow and made of a monotone (white/green) plastic. reasonable quality and build size of 200*200*250mm. Resolution looked under a millimeter. Models were slightly dull looking but this was suitable for architectural or design models which is the main use of the machine. The costs to run the machine are made up by charging students a rate for production which included a set amount to ‘fix’ the model (ie plug the holes etc.) and then an hourly rate for the production. This charge is about half the commercial rate. A technician is required to prepare models and operate the machine. Building a model 10 inches high might take about 10 hours.
Here are the types of model that i saw had been made by the Prodigy Plus.


Here’s a more recent model from the FDM 400 mc.
The fact that i can’t find many decent models by the recent machines is frustrating, they seem to be more geared toward engineers than artists.
ZCorp
ZCorp’s 3d Printers use a different technique they boringly call Three Dimensional Printing. This involves a multi-headed ink jet system which places colored powders in layers (about as fast as 2D printing). There’s a good demo video here . So there is no support structure to remove, just a lot of powder, 80% of which is recycled.
By the way Fripp design are a UK company who sell the ZCorp machines and also a bureau service they did have an ex-demo model going cheap a few hours ago.
ZCorp have three models here they are:
ZPrinter 310 Plus (monochrome, affordable, easy to use)
8*10*8 inches 300*450 dpi 1 printhead
ZPrinter 450 (full color, automated, office friendly automatically cleans model up)
8*10*8 inches 300*450 dpi 2 printheads
Spectrum Z510 (premium color, highest resolution, largest size)
10*14*8 inches 450*600 dpi 4 printheads

Here’s some images from Zcorp’s gallery:
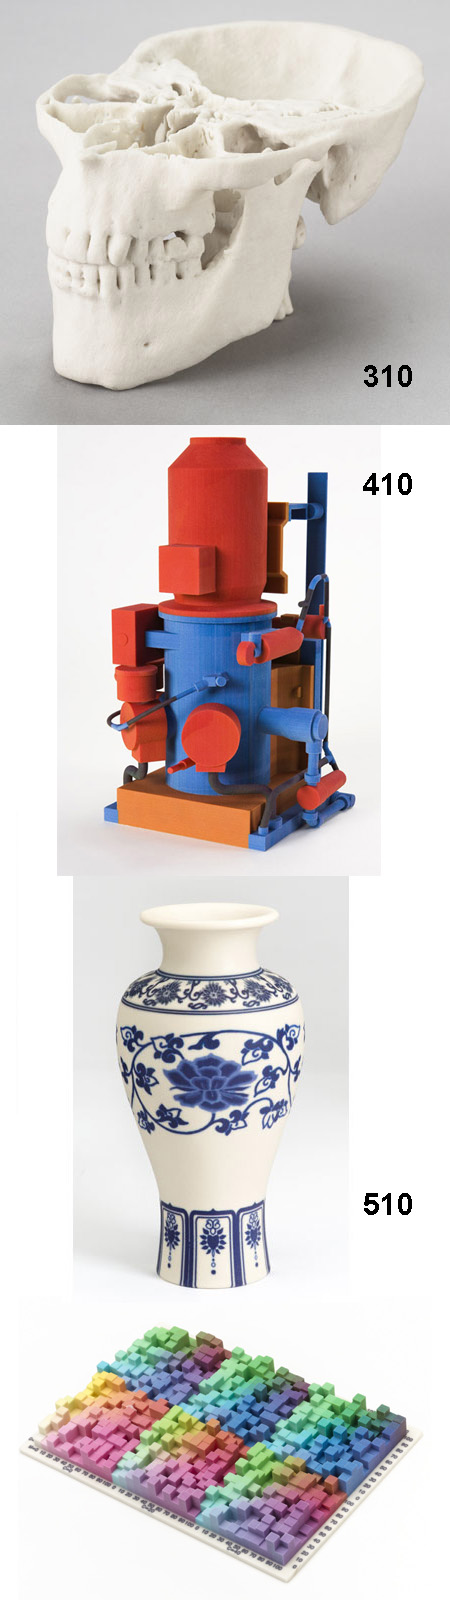
There’s a slight powdery quality to some of these – but i think that can be smoothed in post processing, or you have a choice over the surface texture when you print. I’m not clear if the color variation is continuous but it is certainly quite nuanced. And the level of detail in the bottom one is amazing.
Comparison
There is a great diagram from EMS website which compares the detailed quality difference of the major current 3D Printers:

Cheap and Cheerful Approaches
( Mostly lifted from Additive3d.com )
RepRap
RepRap is short for replicating rapid-prototyper, an open-source 3D printer design project initiated by Adrian Bowyer at the University of Bath. RepRap uses robotic thermoplastic extrusion similar to fused deposition modeling at present, but ceramic, metal and other materials may also be possible at some point. The ultimate intent of the project is to eventually produce a machine which can make copies of itself. Parts kits and individual items are now available from these sources for about $600.
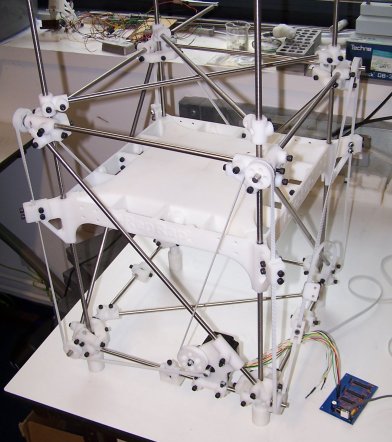
Looks like a bunch of rods but the white joiners were made by the machine itself, here are some parts:

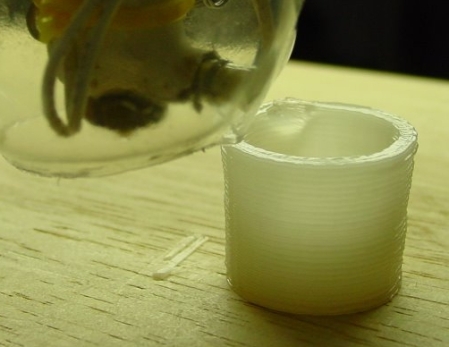
It is now a tradition that – when anyone makes a RepRap machine – the first item they make is this shotglass, so they can toast the machine using something that it itself has made.
This would be a great buy if it came with a student to build it!
Fab@Home
An ***open-source*** project to design, develop and manufacture an inexpensive syringe-based additive fabrication machine and related software. The components to build the device can be had for as little as US$2,500, and a variety of materials can be used for building, from silicone to chocolate. The project is led from Cornell University, but there are participants from all over the world. A good choice for real pioneers and do-it-yourself fans who may be satisfied with parts and models that will not achieve a high level of precision, durability or speed of fabrication for some time to come.
Here’s a house they made…
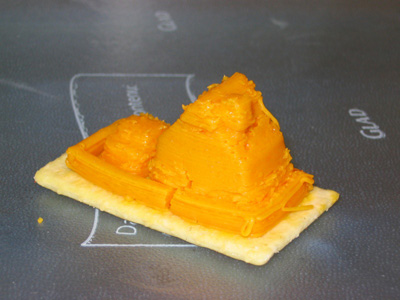
…looks like a good use for squeezy cheese.
The cheapest 3D Printer! Less than $5000!
Desktop Factory 125ci
The Desktop Factory 3D printer builds durable, functional models from the bottom up, one layer at a time. The Desktop Factory 3D printer has a build speed comparable to existing 3D printing technologies, and produces robust parts that are strong enough to be thrown across a conference room table!
Build envelope = 5 * 5 * 5 inches
Layer thickness = 0.2 mm.
halogen light source and drum printing technology
composite plastic powder

They kind of look like clay models.
Good if all you’re interested in making something solid, like a brick.
V-Flash under $10000
This is a next-generation photopolymer-based technology which is said to have many of the characteristics of stereolithography, such as good finish and accuracy, but also limited material choices and properties. The technology builds an entire layer at a time and should also be relatively fast. The first machine based on the technology is now expected be introduced late in the first quarter of 2008 at a price of US$9,900.
You can see the support structure scaffolding clearly here.
They also make some high end 3D printers but as you can see in the comparison image above the quality is behind zcorp.
Conclusion
I hope this has been useful, its clear my recommendation lies with the ZCorp 510. Although the model size is not huge (10*14*8 inches) the color and detail makes up for this. If you want bigger then you will have to pay a lot more (and if you have a spare $200,000 then you can build up to 1 m in height). The Zcorp machines are also faster than the Stratasys ones, and the materials cost about half as much judging from the prices on the bureaus. If you want a less messy alternative then the Zcorp 410 could almost be run without a technician at all, as the dust removal process is partially automated.
After all that research I’m off to have a drink!


29/05/2008 at 1:20 pm |
Excellent story. We like to share a movie with you about the process of concept to 3d prototype at http://www.sotopiaconcepts.com/uk/services/3d_printing.html
cheers
rene
29/05/2008 at 2:39 pm |
If you’re interested in affordable 3D printing of your designs, I’ve good experiences with a new service called Shapeways.
18/06/2008 at 4:49 pm |
hello liked your article… I recently used “3D art to part” for a model. They are very efficient and got the job done and delivered from the states to the UK very fast. And cheap too!!
Not the highest rez, but enough for me to realize where I had made a few errors!!
You did miss out one machine which looked promising though, the3D Systems InVision LD 3-D Printer, a real desktop machine. Check the link http://www.3dsystems.com/products/invision_ld/index.asp . Pricing not so hot though!! € 13,950!! Phew!!
bye
Rick
18/06/2008 at 5:29 pm |
I’d point out that the reprap has already replicated itself once. Some people quibble with “replicated” pointing out that some parts are purchased and the machine does not assemble itself. I say that “self-replicating” means that it builds all the parts for which fabrication is cheaper than purchase.
18/06/2008 at 5:52 pm |
Thanks for this review 🙂
Ture home use 3D printers are still some way off.
18/06/2008 at 10:34 pm |
It’s obvious that you don’t have a very good idea of what to expect from different technologies and machines. You are comparing apples with pears and making conclusions based on literature.
It’s like saying: that mazda is a lo more shiny than that ferrari, so it must go faster.
19/06/2008 at 12:42 am |
I’m curious to know if you’ve used any of the machines in review. I have been using a ZCorp 310 for several years, prior to which I used a crude FDM machine. I am an industrial designer who works closely with an engineering team so I have seen the user experience for both disciplines. For our purposes the colored parts, though appealing, are of marginal benefit–they’re useful for identifying unique pieces, but the color saturation isn’t useful for aesthetic models. The de-powdering process of the ZCorp machines is a crude, labor-intensive mess. The powder is the consistency of plaster of paris or baking flour, and must be carefully vacuumed or swept away–this is inevitably messy since removing parts from the build-bed feels a lot like amateur archeology. Powder invariably spills out around the bed and must be vacuumed up–not a problem in itself, but it quickly coats all surrounding surfaces in a fine dust, many of which are lubricated, creating gooey clumps of greasy powder. The parts then must be carefully infiltrated with your choice of hardener–we use cyanoacrylate (superglue), epoxy and paraffin wax. Epoxy produces the strongest parts, but handling the uncured product is messy, smelly and potentially hazardous to one’s health. The end result is often quite good, but the whole process is time-consuming. If you include time spent, SLA parts don’t look so expensive, and in our area the turnaround time might only add as much as one day. The 450 machine does appear to address much of the hassle of the experience, though I’m disinclined to believe it is quite as simple as ZCorp would have you think.
The latest generation of FDM machines has been promising, as the resolution of these machines has improved dramatically over the last decade, and the finished part strength is quite good. Cleaning and handling these parts straight off the bed is very appealing. They do tend to be more expensive than ZCorp’s offerings, and the finished part resolution isn’t always as crisp.
The bottom line is that none of these machines produces parts that allow for aesthetic analysis without a considerable amount of finish work, which equates to time. Furthermore, getting the ZCorp parts into a functional state is more challenging that it appears–calculating for thickness added during the build process is only somewhat predictable, and the “green-strength” of the parts often necessitates increasing wall thicknesses well beyond what is acceptable for the part requirements. Given the time and cost variables, for any professional I would recommend actually using each type of machine before settling on one. Finished parts do not convey the whole story.
19/06/2008 at 2:19 pm |
I was really surprised not to see a mention of the Eden line of printers from Objet. These machines leave everyone else behind in the dust with 16 micron vertical resolution and a wide variety of printing mediums for different applications and requiring no post processing other than removing the support medium. Seriously, check them out.
19/06/2008 at 4:49 pm |
Just a point of clarification…I have a ZCorp Zprinter 450 at my lab at school, and it uses a monochromatic powder (sort of like pulverized drywall) and standard HP inks for color. Sawing those color models in half would reveal that the color is only present as a thin skin along the outside of the model, which saves tons of ink. It’s definitely a cool machine, and I put it through its paces printing some of Bathsheba Grossman’s math models – http://www.bathsheba.com/downloads/
19/06/2008 at 6:56 pm |
A well deserved drink indeed.
19/06/2008 at 7:11 pm |
My Project Lead the Way teacher described these to our class after he had seen one. I guess a friend of his owned one. My teacher scanned in his face somehow and converted it to a file the 3D printer could read. I believe he did this doing autodesk inventor. It was pretty neat to see a model of my teacher’s face that was actual scale and perfectly detailed. There was no color, so the model looked sort of like a marble statue.
20/06/2008 at 10:35 am |
I’ve recently had something printed myself on a Z450 and unless the object is post-processed in a bath of resin it’s indeed super powdery. Here’re 2 shots of a failed experiment (due to too much model detail)
In the end we got it all worked out and the final finish is very much like bone (the colour too).
Also, ThingLab, the London studio where I had this printed have just got a new ProJet HD printer which has up to 650dpi (in XY) and 800dpi (Z) resolution… The surface finish of the samples I’ve seen looks amazing… but I guess, the prices for this are still out of reach for experimental work 😦
20/06/2008 at 1:55 pm |
I would second (or third or fourth) the comments on the zcorp machines.
awesomely cool devices and when a model has been finished it’s amazing.
Getting the uncured part out of the printer and then curing it is less cool.
As “me” mentions above, the vuring is done with cyanoacrylate, epoxy resin or paraffin.
Paraffin gives a decent texture, is easy to work with but doesn’t give great strength.
Epoxy resin is the strongest but the fumes are highly toxic and working with it is nasty in all respects. Gettin the surface texture good can be tricky (if epoxy gloop gets left on the surface you can easily get streaks.
Cyanoacrylate… mmmm yummy. Using a half liter bottle of superglue and rubbing it into the surface of your model…
Or if you’re REALLY well equipped, use a vat of super glue and dip your model in that for better surface penetration.
Super glue costs around U$150 for half a liter, and once opened only lasts a limited time.
And is nasty.
all that bitching aside, zcorps stuff makes the nicest models, no question. You can even make casts for casting simpler models from more durable materials.
In one or two generations of development these devices are going to be really cool and even usable by mere mortals
22/06/2008 at 12:52 am |
Superglue’s nasty in that it gets stuck to everything, but not nasty in that it’s not toxic; in fact it’s used for sealing wounds.
I’m amazed at the low cost of these machines. They’re down below the price of the original Apple Laserwriter ($7000 in 1985 dollars).
03/03/2010 at 8:45 pm |
Hello Everyone:
Castle Island’s Worldwide Guide to Rapid Prototyping Web-site IS MOVING! After more than eleven years we’ve found it necessary to change our web address.
Our new address is
http://www.additive3d.com
– or –
http://www.additive3d.com
If you link to one of our internal pages please note that the page name will remain the same, simply replace the old domain with the new one.
Note: Our old address [http://home.att.net/~castleisland/] will become INACTIVE very shortly.
Thanks for linking to us in the past. We apologize for the inconvenience and hope you’ll continue to keep informed about this quickly-changing field with us. Please don’t hesitate to let us know if you have questions or comments.
Best regards,
Ed Grenda
Castle Island Co.
119 Webster Street
Arlington, MA 02474 USA
781-646-6280
EdGrenda@aol.com
The Worldwide Guide to Rapid Prototyping
25/05/2012 at 12:50 am |
Very very nice projects.
New 3d printer Ultimaker news http://ultimaker.blogspot.com/.